While this post has been literal months in the making, I am so excited to share that the foundation is officially completed! It only took more than twice as long as we originally thought it would, but there were lots of different reasons for that. Looking back through my photos to find the best ones to share I realized that we’ve been working on this project for THREE months. Honestly we were hoping to be a lot further with the whole Cabin project by now, but what can you do?
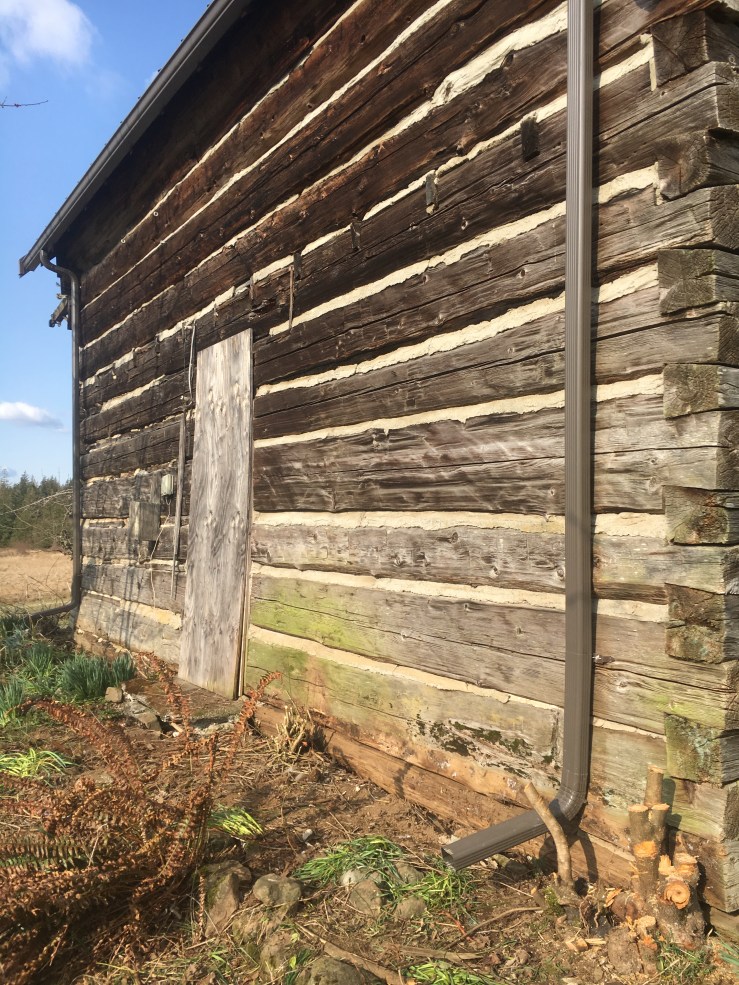
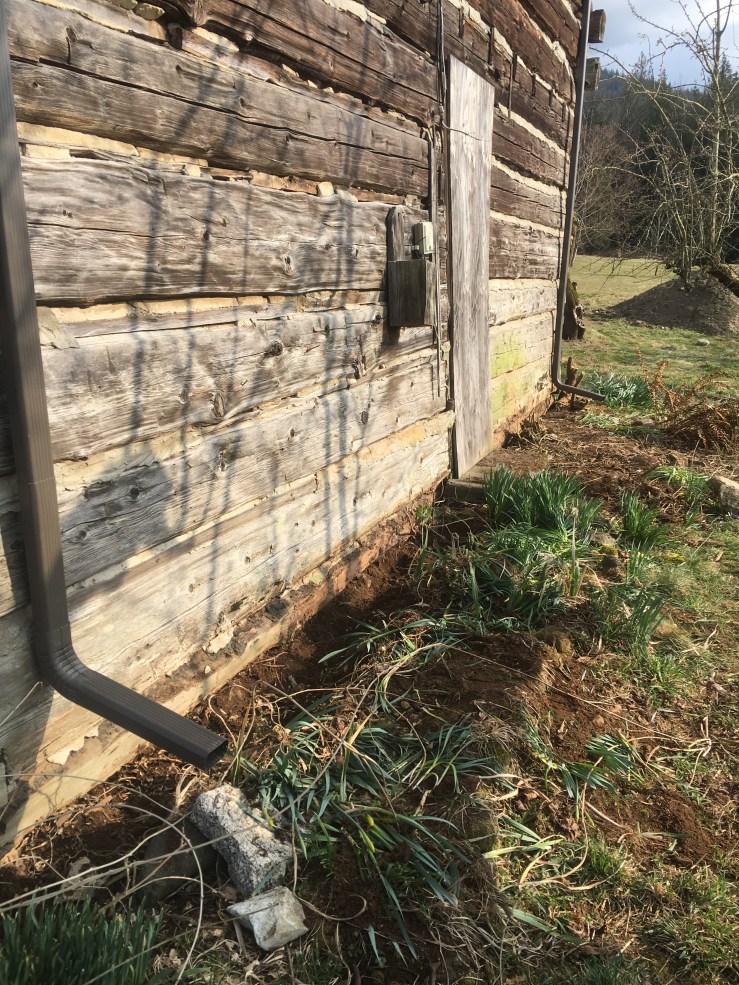

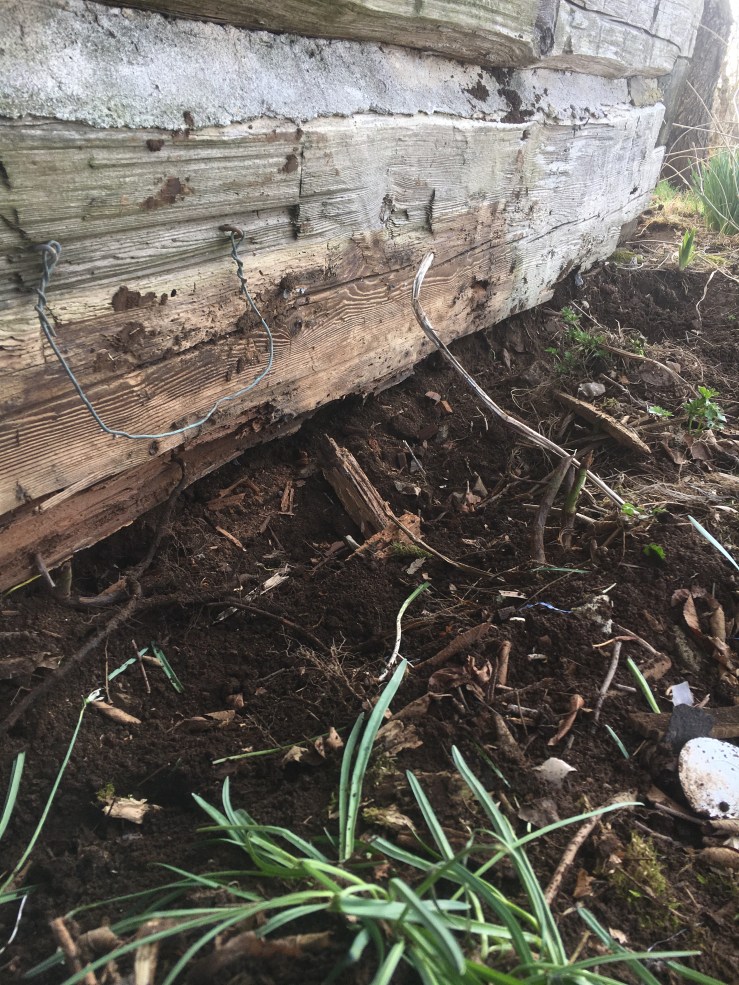
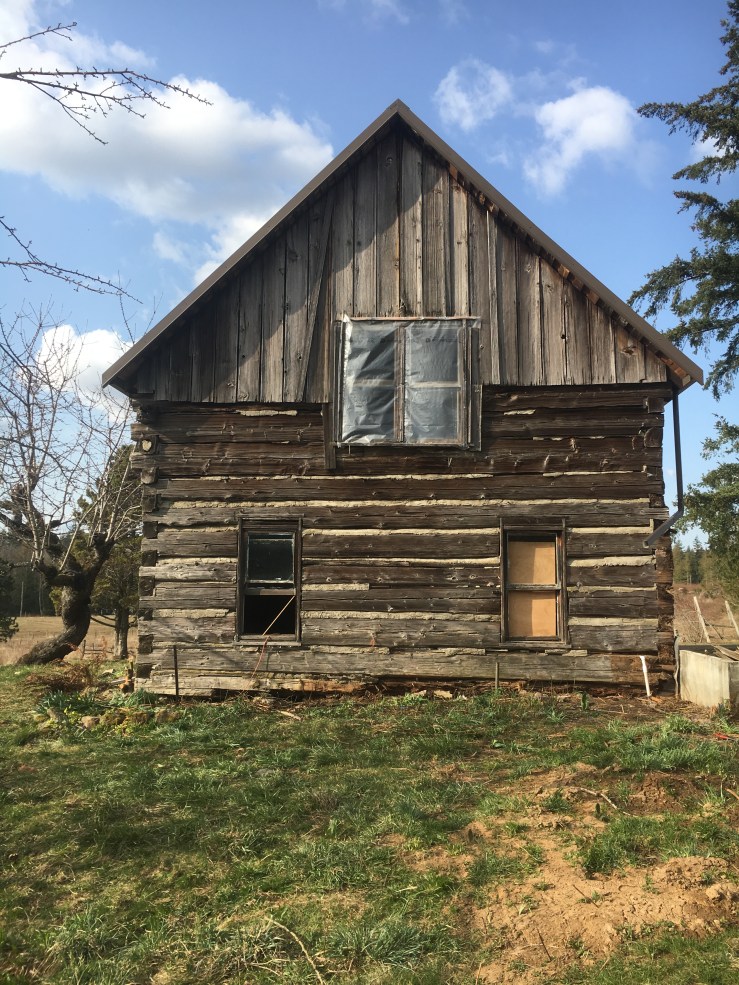

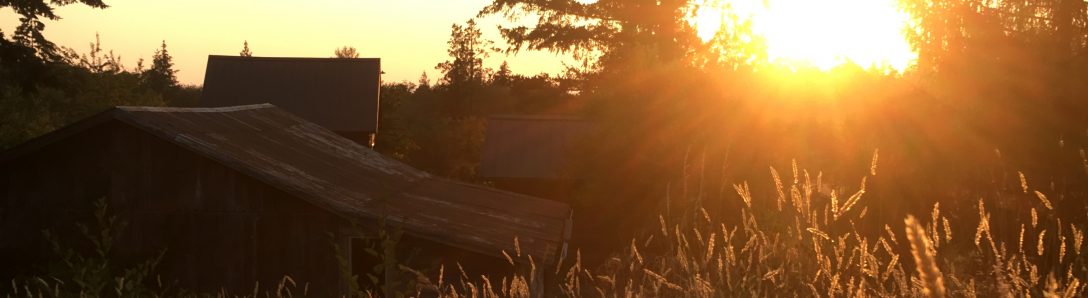
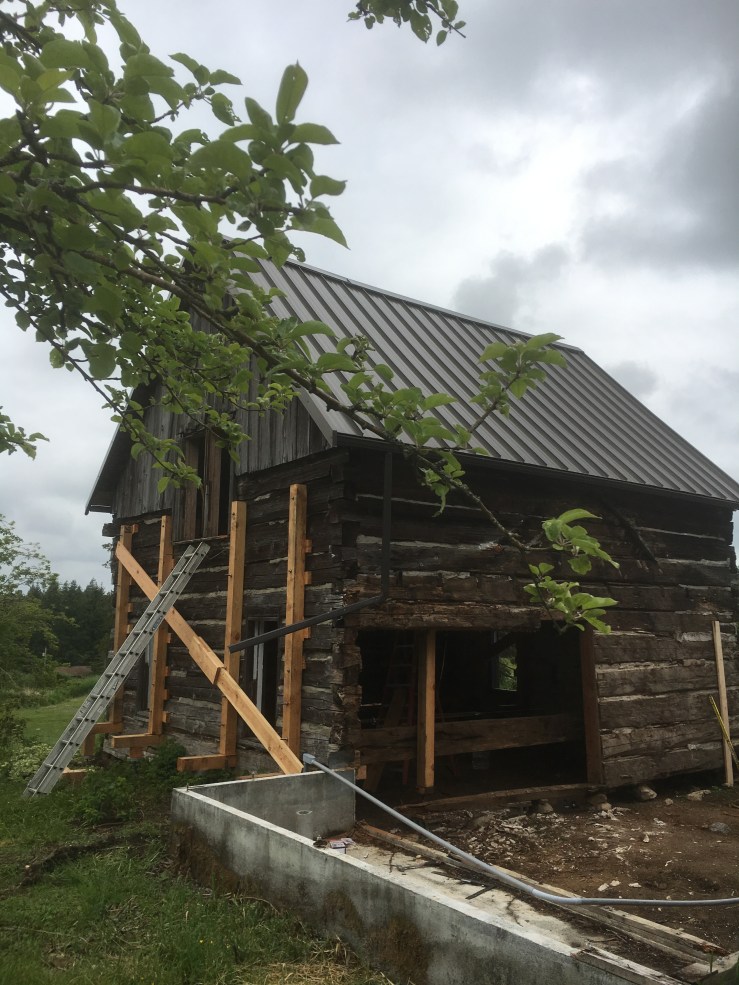
Above are some pictures just to remind us all why this enormous painstaking project was necessary in the first place. Our Cabin was originally built on a “foundation” of stacked rocks (3+ deep in the dirt/clay we discovered!!). Over time the Cabin had settled and a lot of the bottom logs were either completely in dirt and rotting away or just pieces were touching the dirt and resulting in ill effects. Due to the vast amount of damage we opted to take the bottom two logs out and replace them with a solid concrete foundation. Silly me was thinking this would take a month TOPS. Three months later we are gladly taking a small break before we start our next big project.

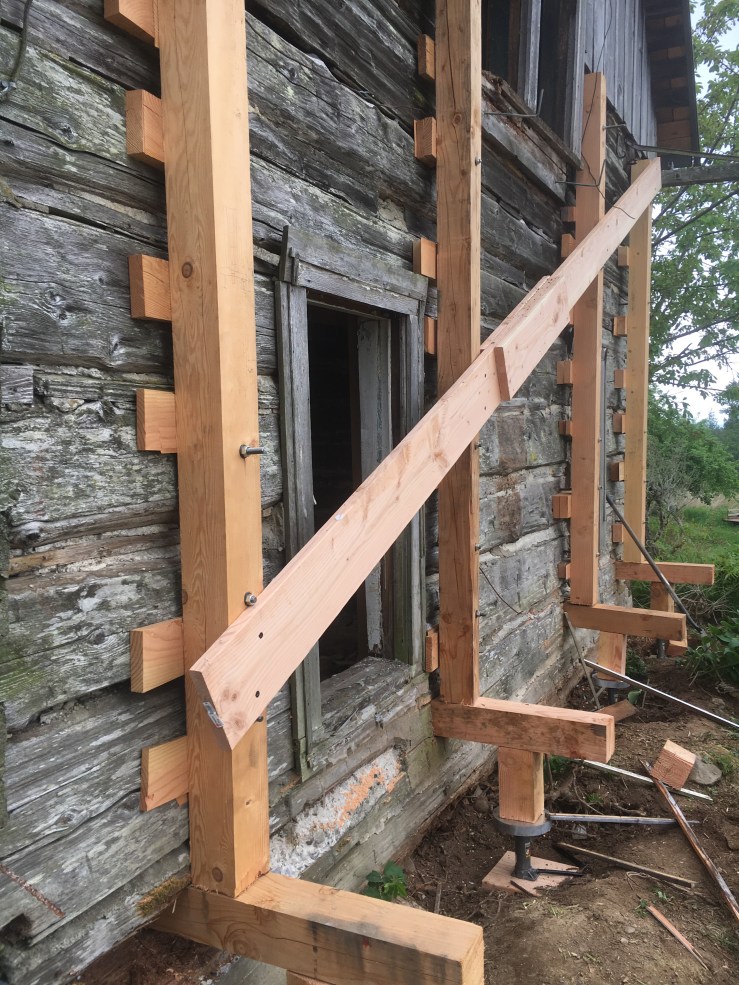
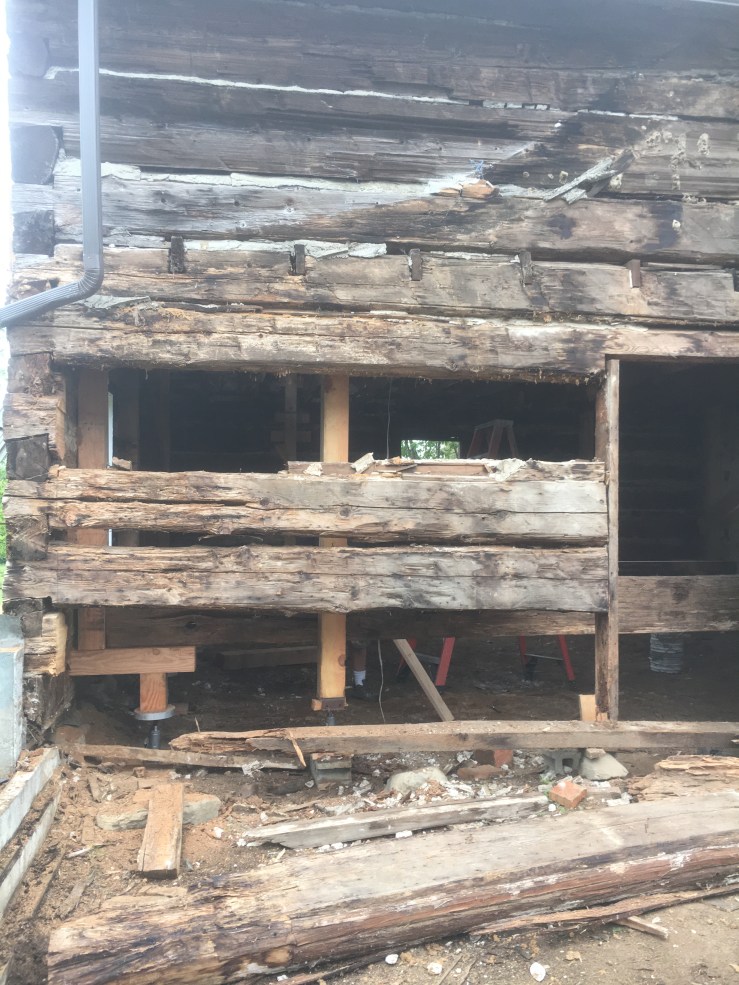
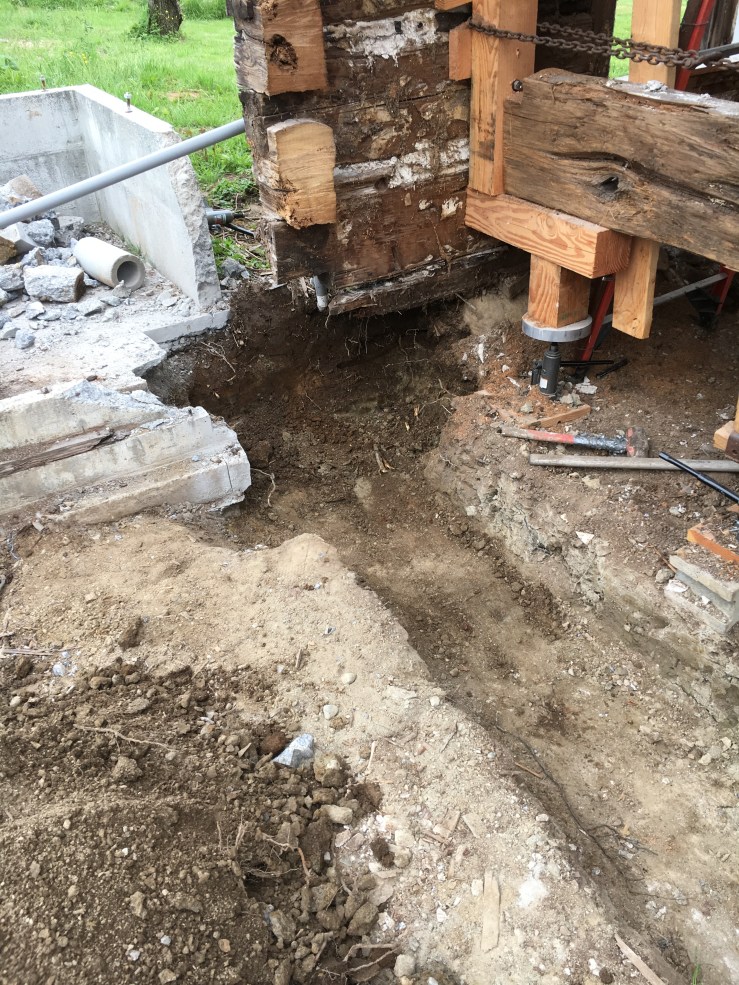
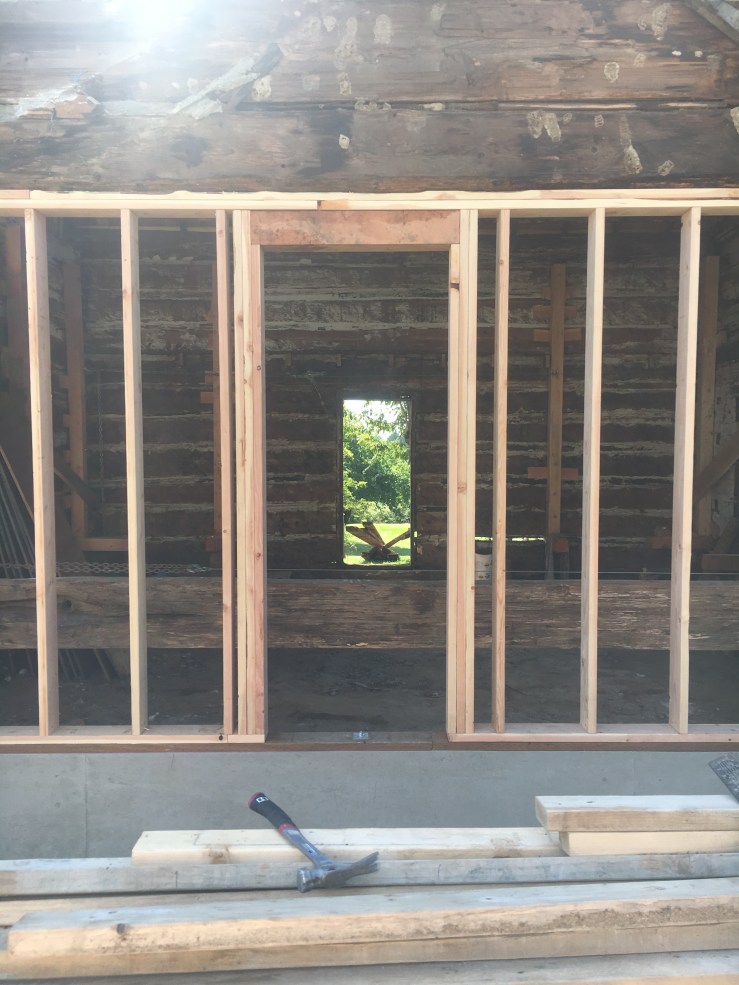
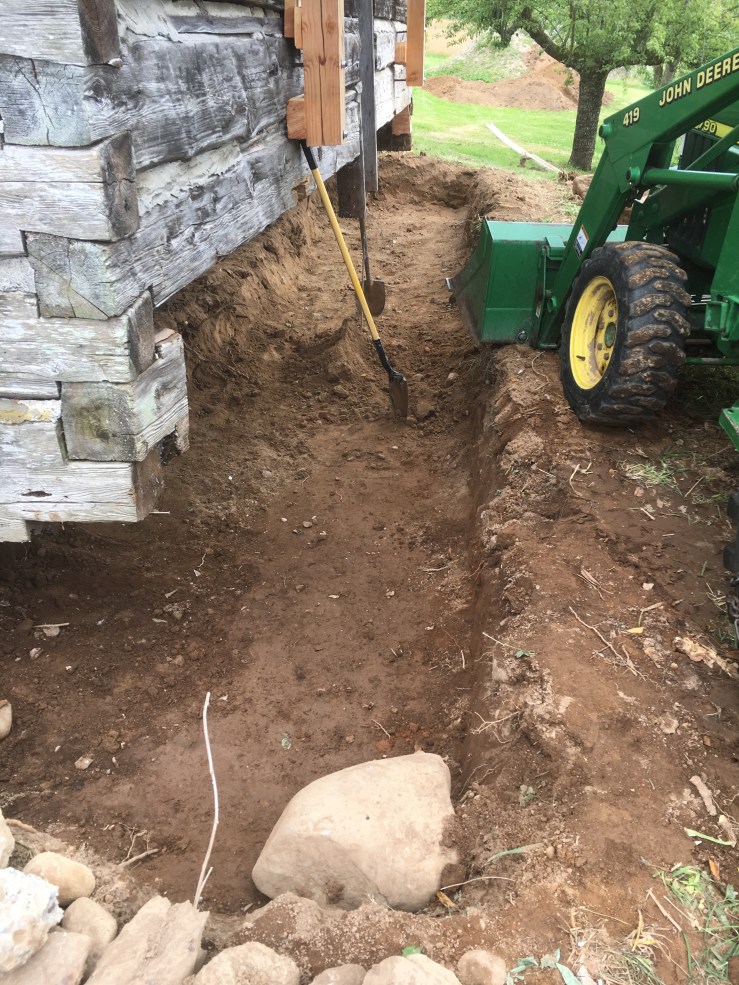
The first thing we had to do for this project was to lift it slightly off the bottom logs so that we could remove them and gain enough space to dig out the foundation ditches. That is where I left off in the updates with this project because the immediate next step was the really scary one, and lasted nearly 2 months! We had to remove all the water damaged logs from the addition side of the Cabin. We contemplated replacing them, but as 770 sq. feet will not be a large enough living space once we begin growing our little family, we opted for a stick built wall that will eventually become the new addition. However, in order to build the new wall, the foundation for said wall needed to be put in first. So we were going to have a three walled Cabin (scary!!) for a bit of time. Which – of course – turned into longer than expected.


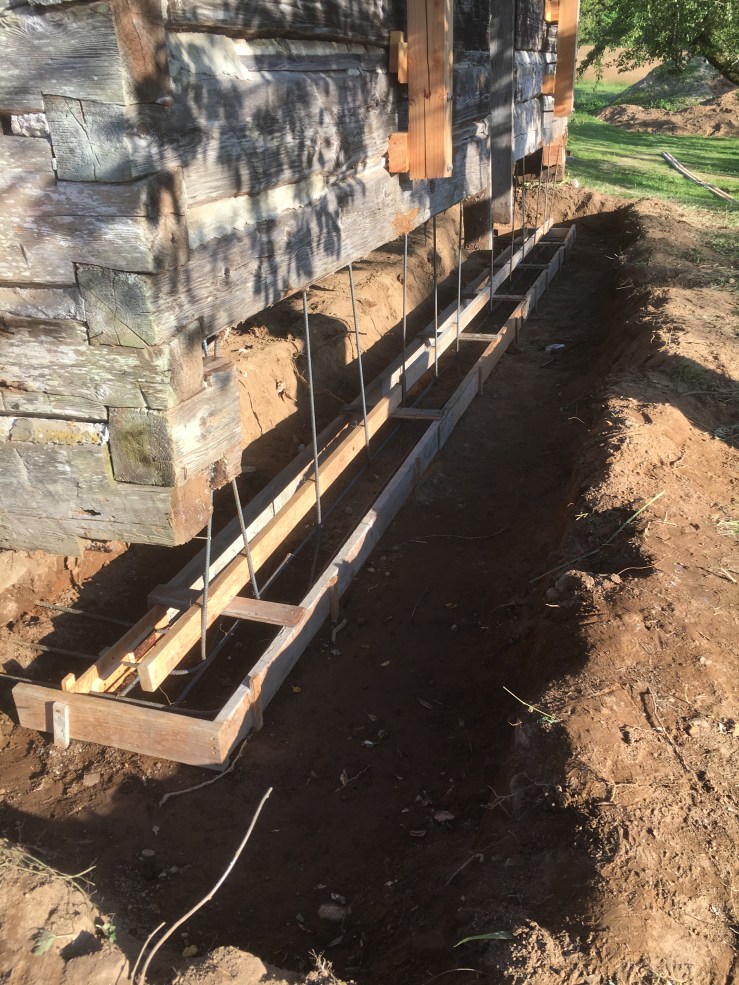
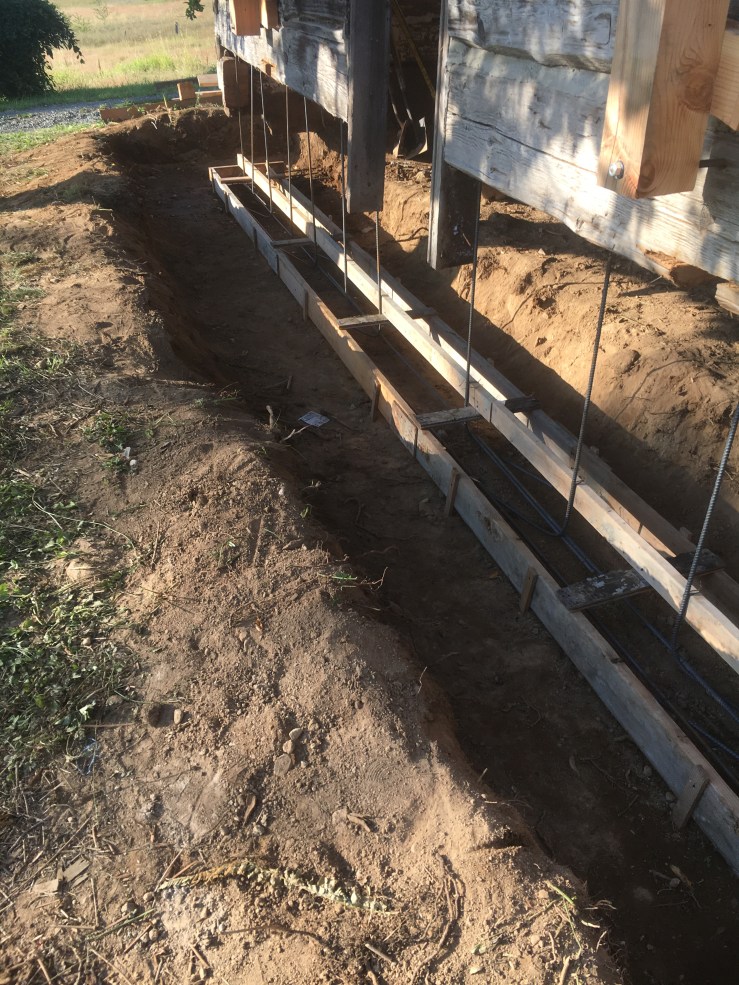
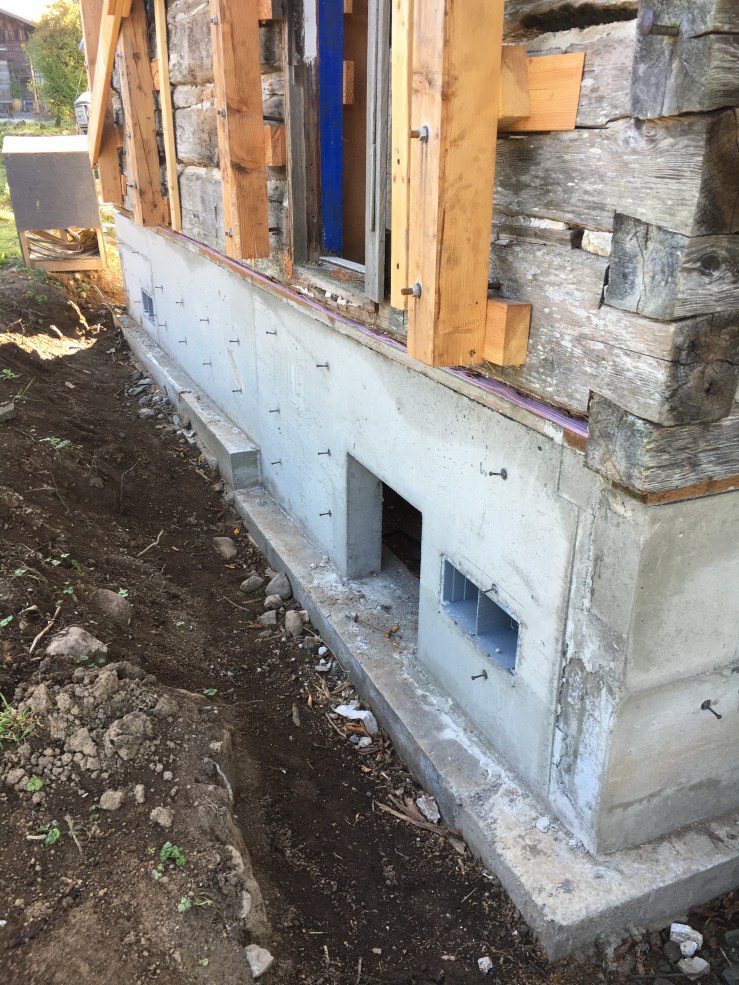
Once we slowly, carefully, anxiously removed the damaged logs, the next step was to dig a ditch for the first wall of foundation. Due to the precarious position of the Cabin we opted to do the foundation walls with separate pours to limit the amount of time it was on three walls and to maintain as much stability as possible. We had the Whatcom County Construction Guide open to ensure everything was done to code, and our handy dandy FIL (Father-in-law) to walk us through the step-by-step of foundation building. Boy I tell ya, foundation building was a lot more challenging than I would have guessed! Especially with a Cabin built with only mostly straight log walls.


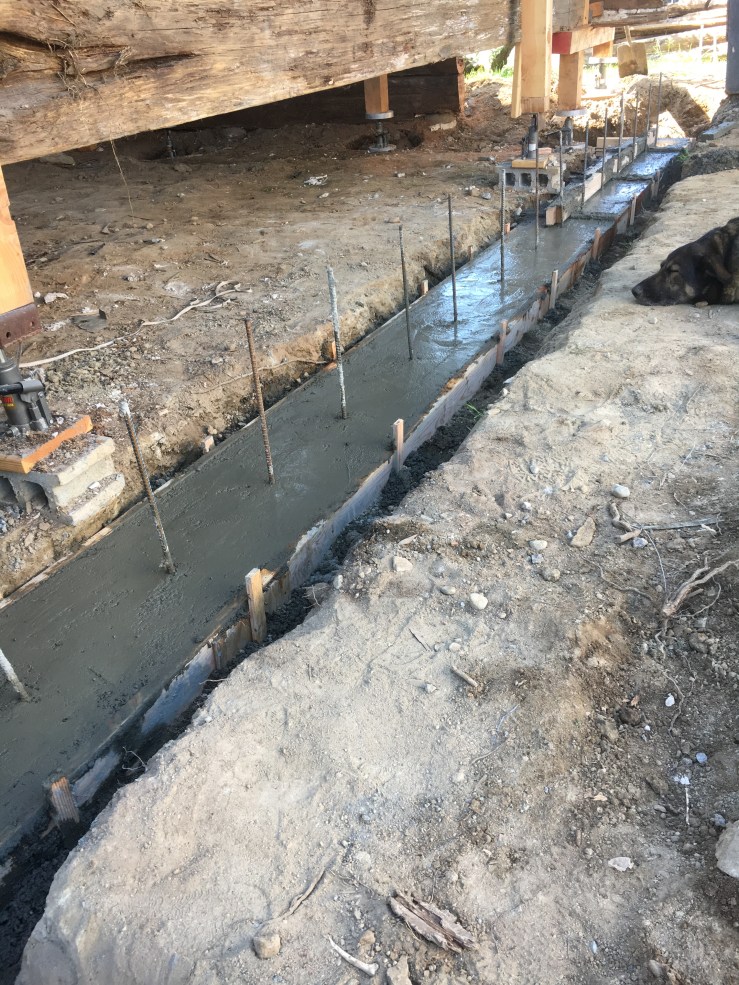

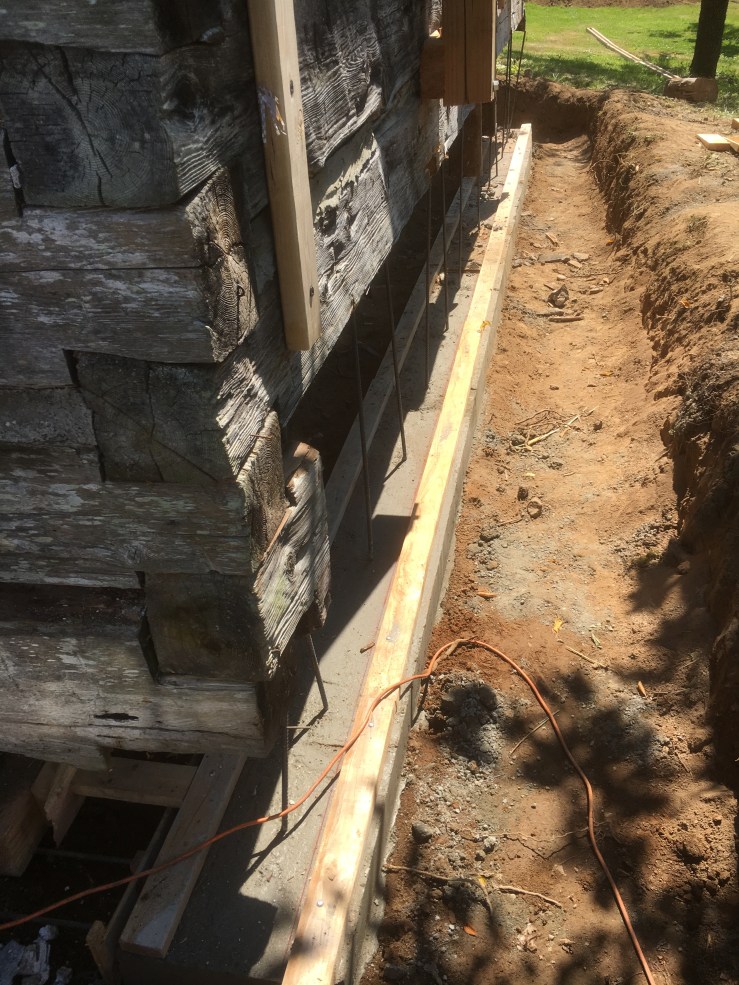
Maverick is always as near as possible throughout our projects. Look at him just napping through all of our back-breaking work! Now the actual pours don’t take very long; but the ditch digging, the leveling, the form building, and the rebar hanging all takes a substantial amount of time. Plus, each side has to be done in multiple pours. The first one we had to do the footing, wait for it to set up and dry properly and then start with the wall (and this first one was the shortest wall without log butting right up to it, so it was quick and easy!).


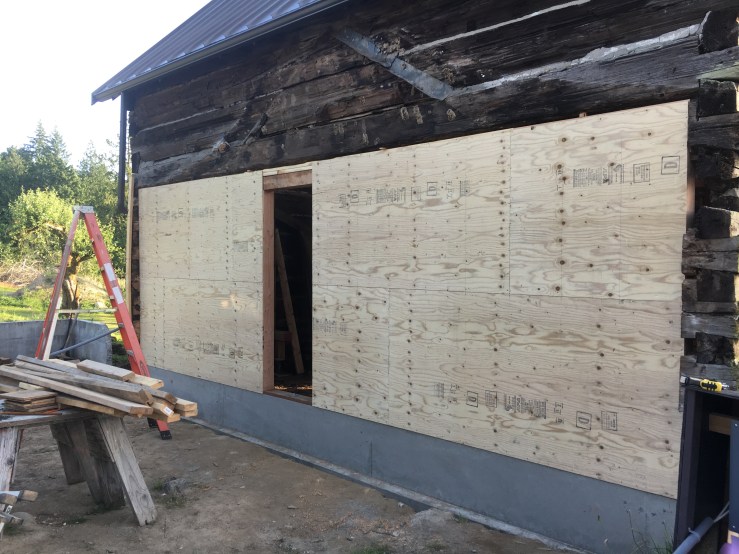

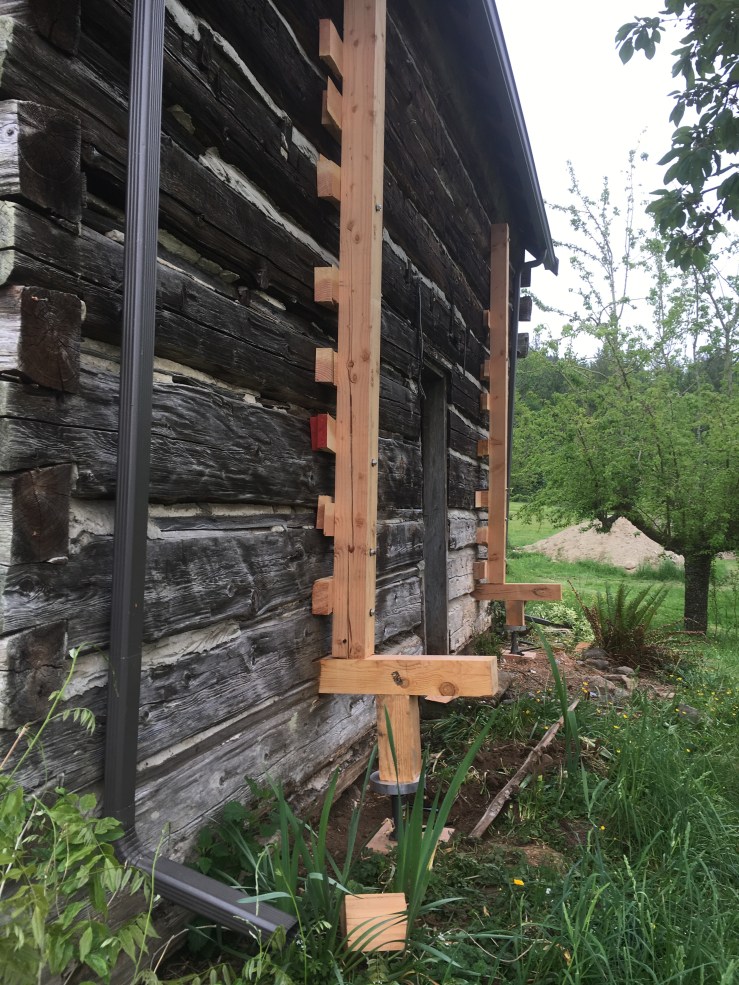
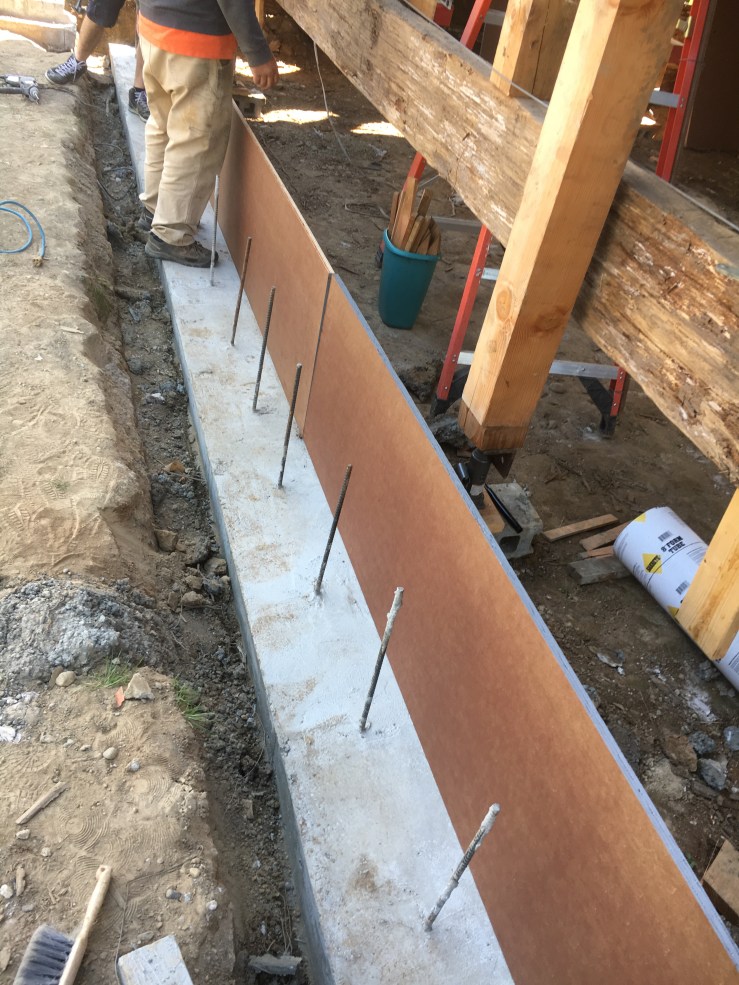
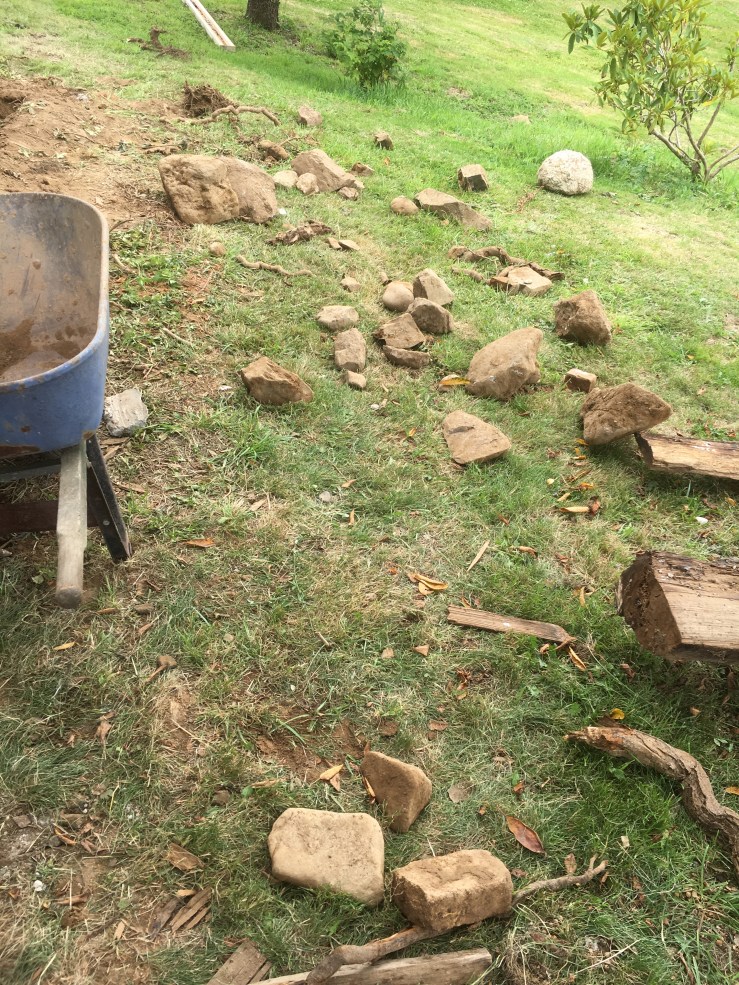
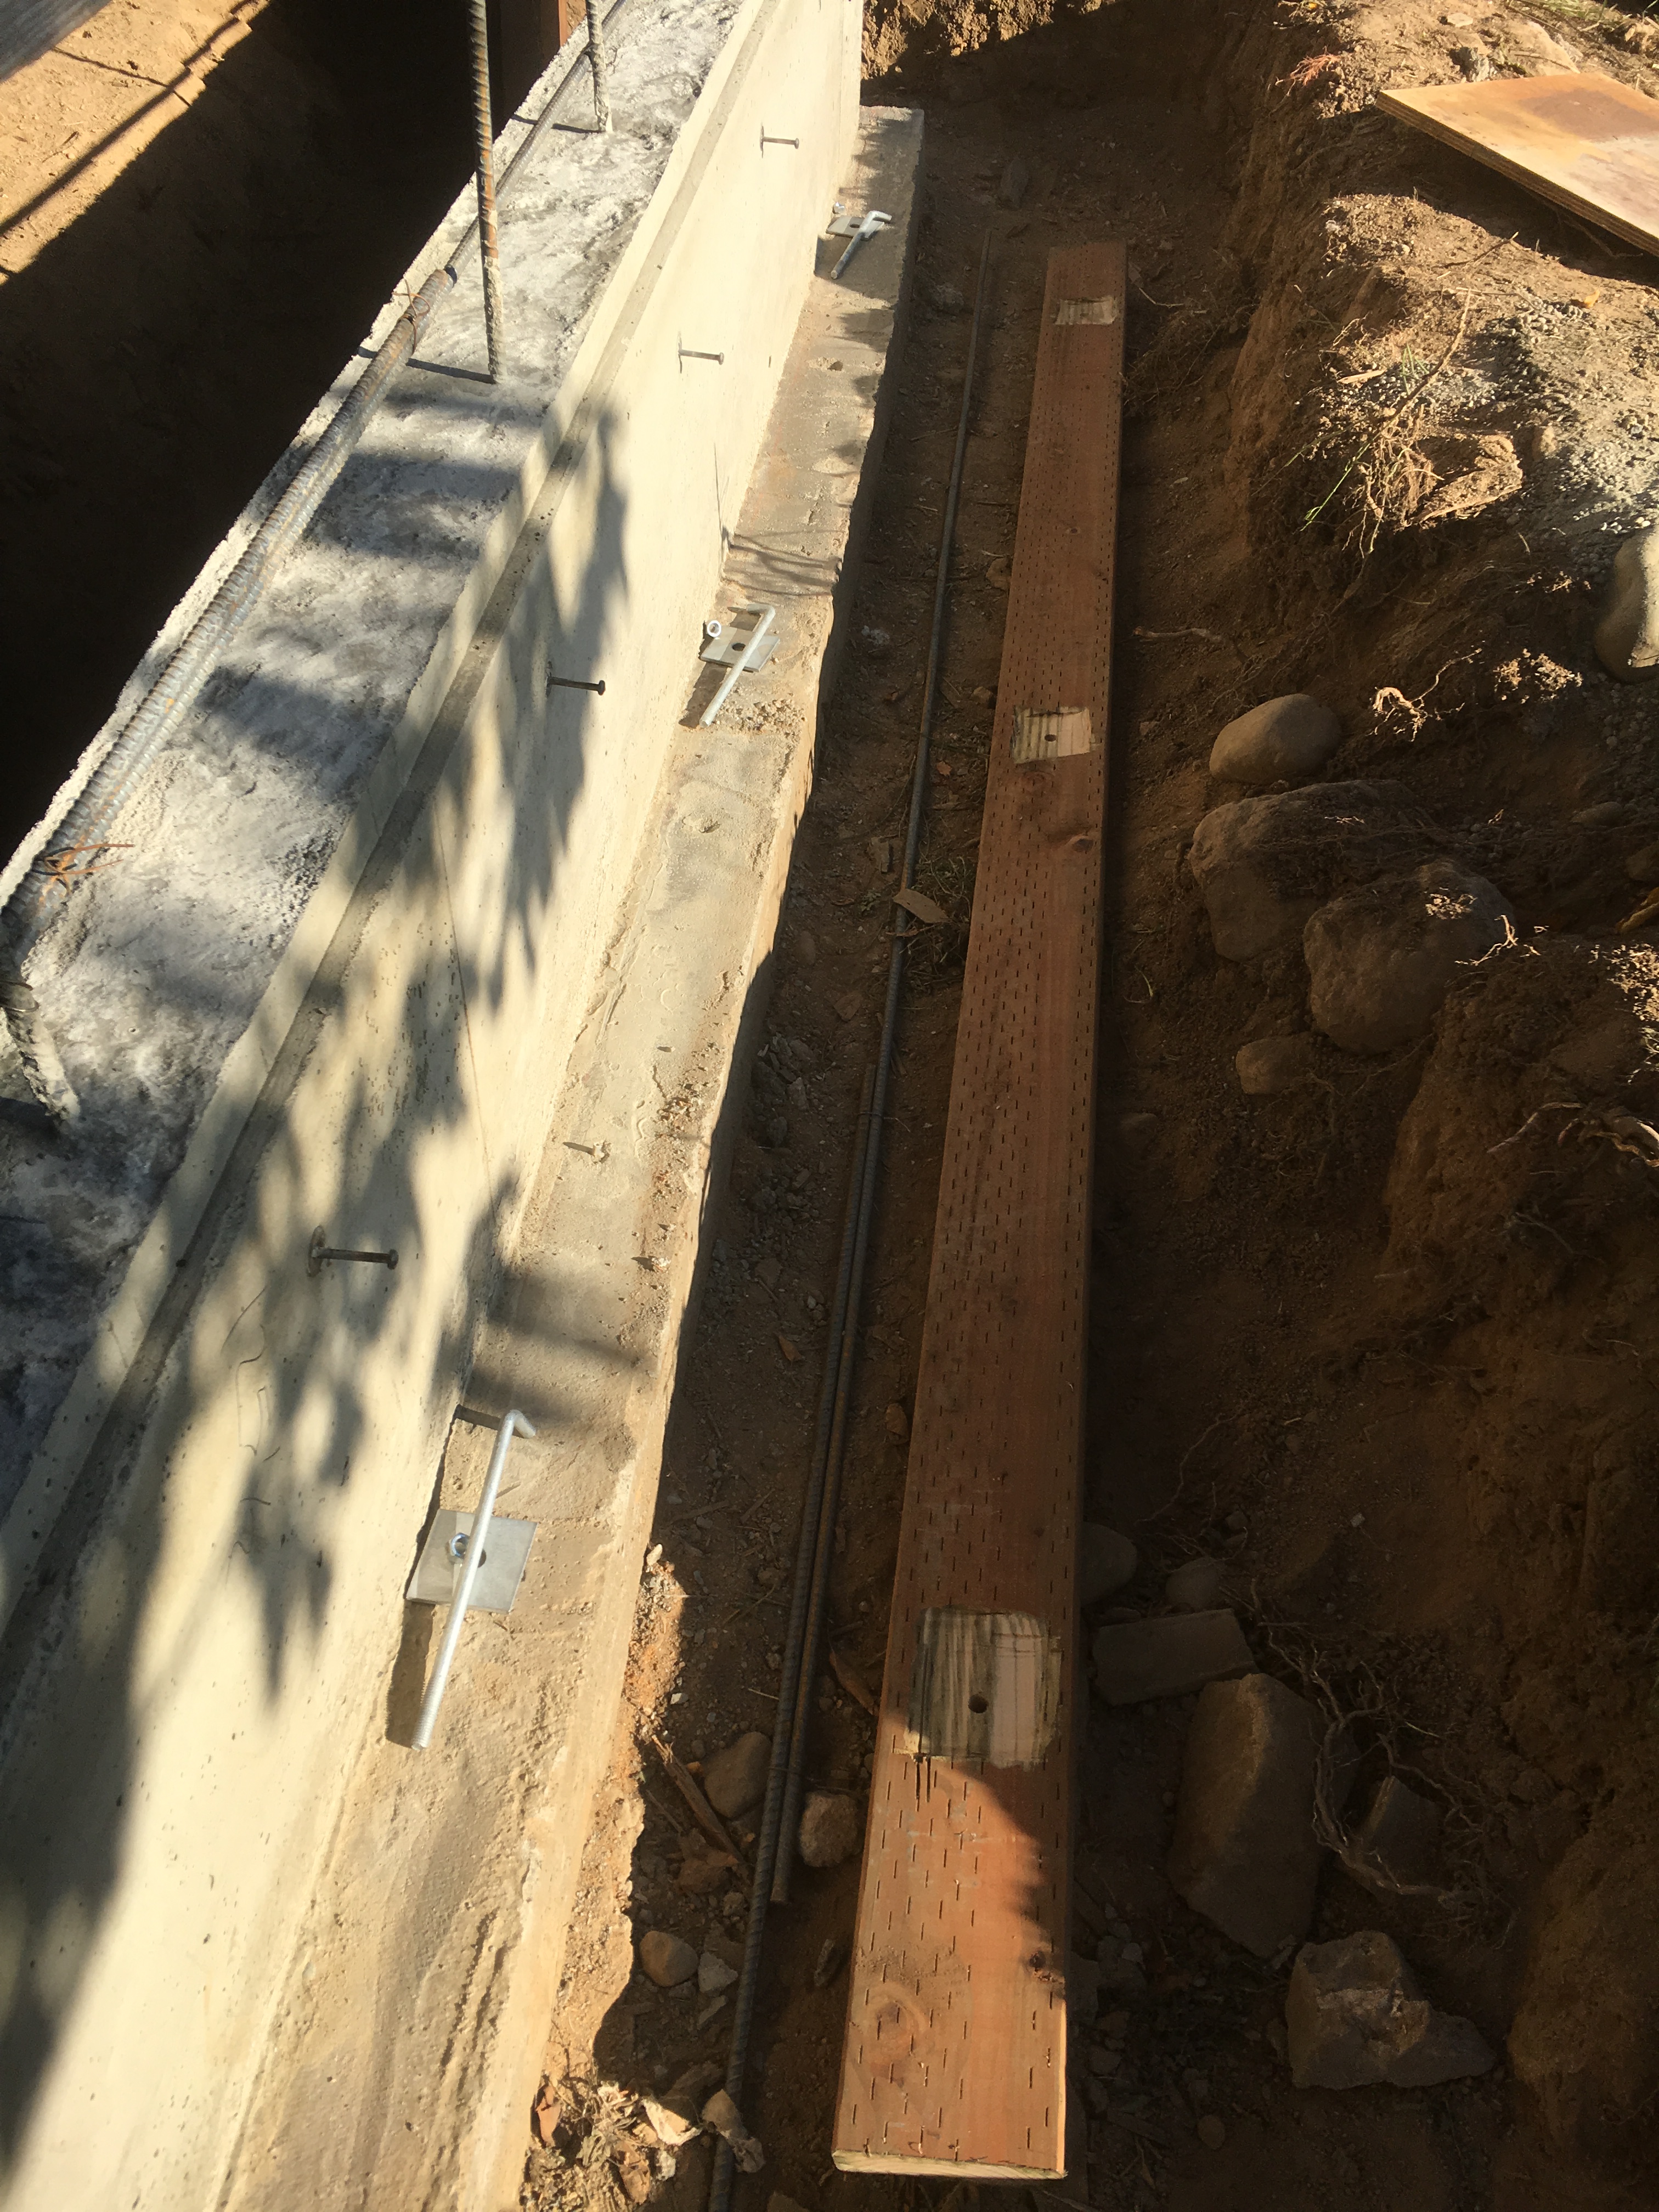
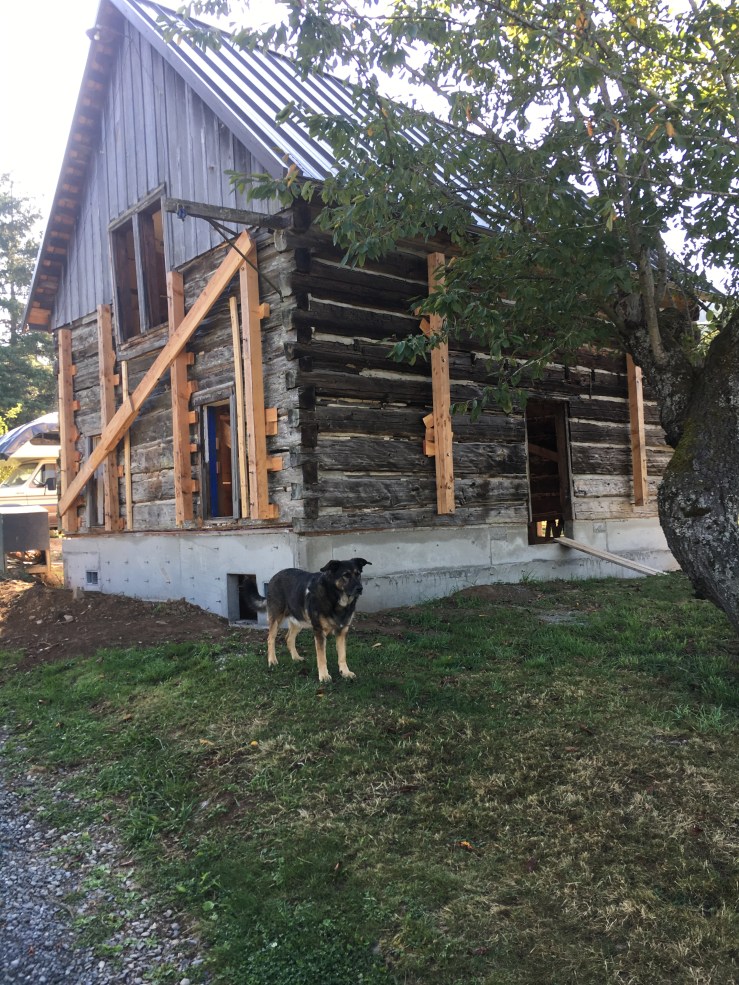
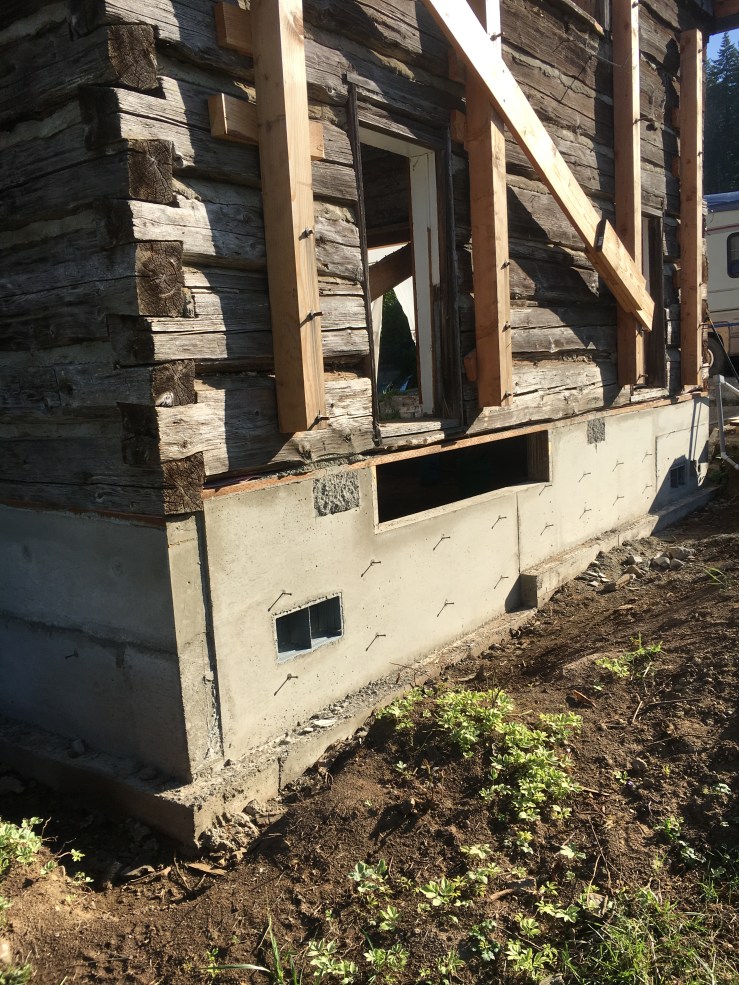
Once we finally had all the foundation done we were able to build the wall. Again, we carefully followed all the Whatcom County construction codes and took pictures along the way to prove it. Eventually we will put some siding up on the new wall, but for now we are staying focused on completing the foundation and getting the Cabin winter-proofed. Next, we decided to do the foundation on the opposite side so that the Cabin would finally feel like it was well supported. Fun story, Husband shovel dug the first ditch (18 inches below grade per code) all by himself. We dug the second ditch together. With shovels. And since the Cabin is built on a slope, it was much deeper than 18 inches on this side!! Oh, and those foundation rocks? So. Much. Fun.
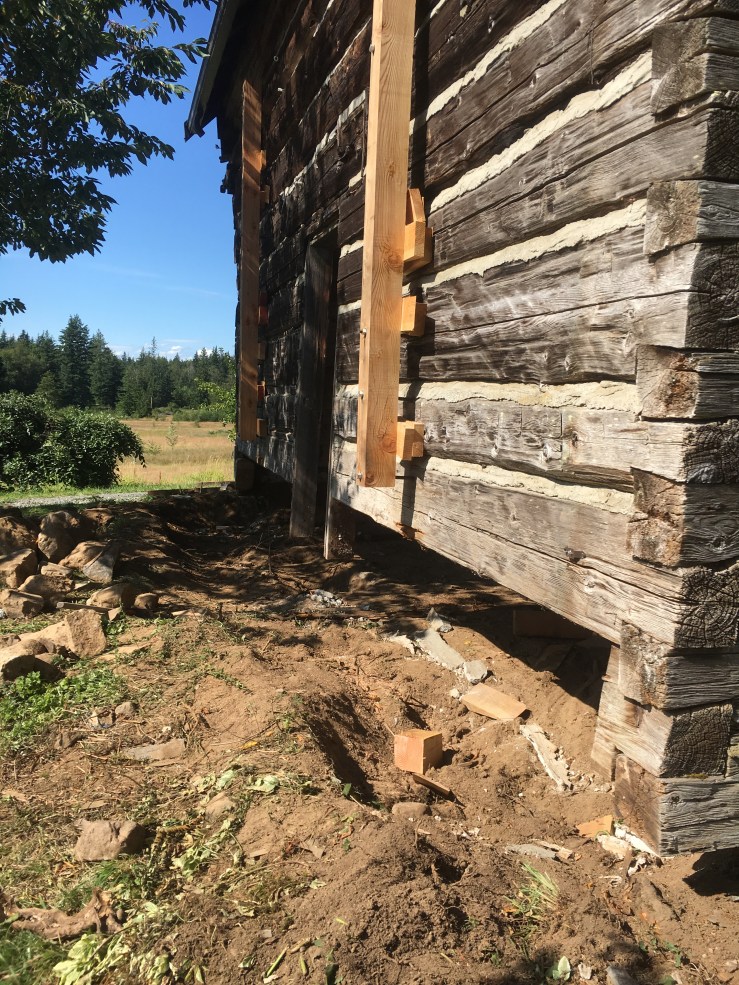

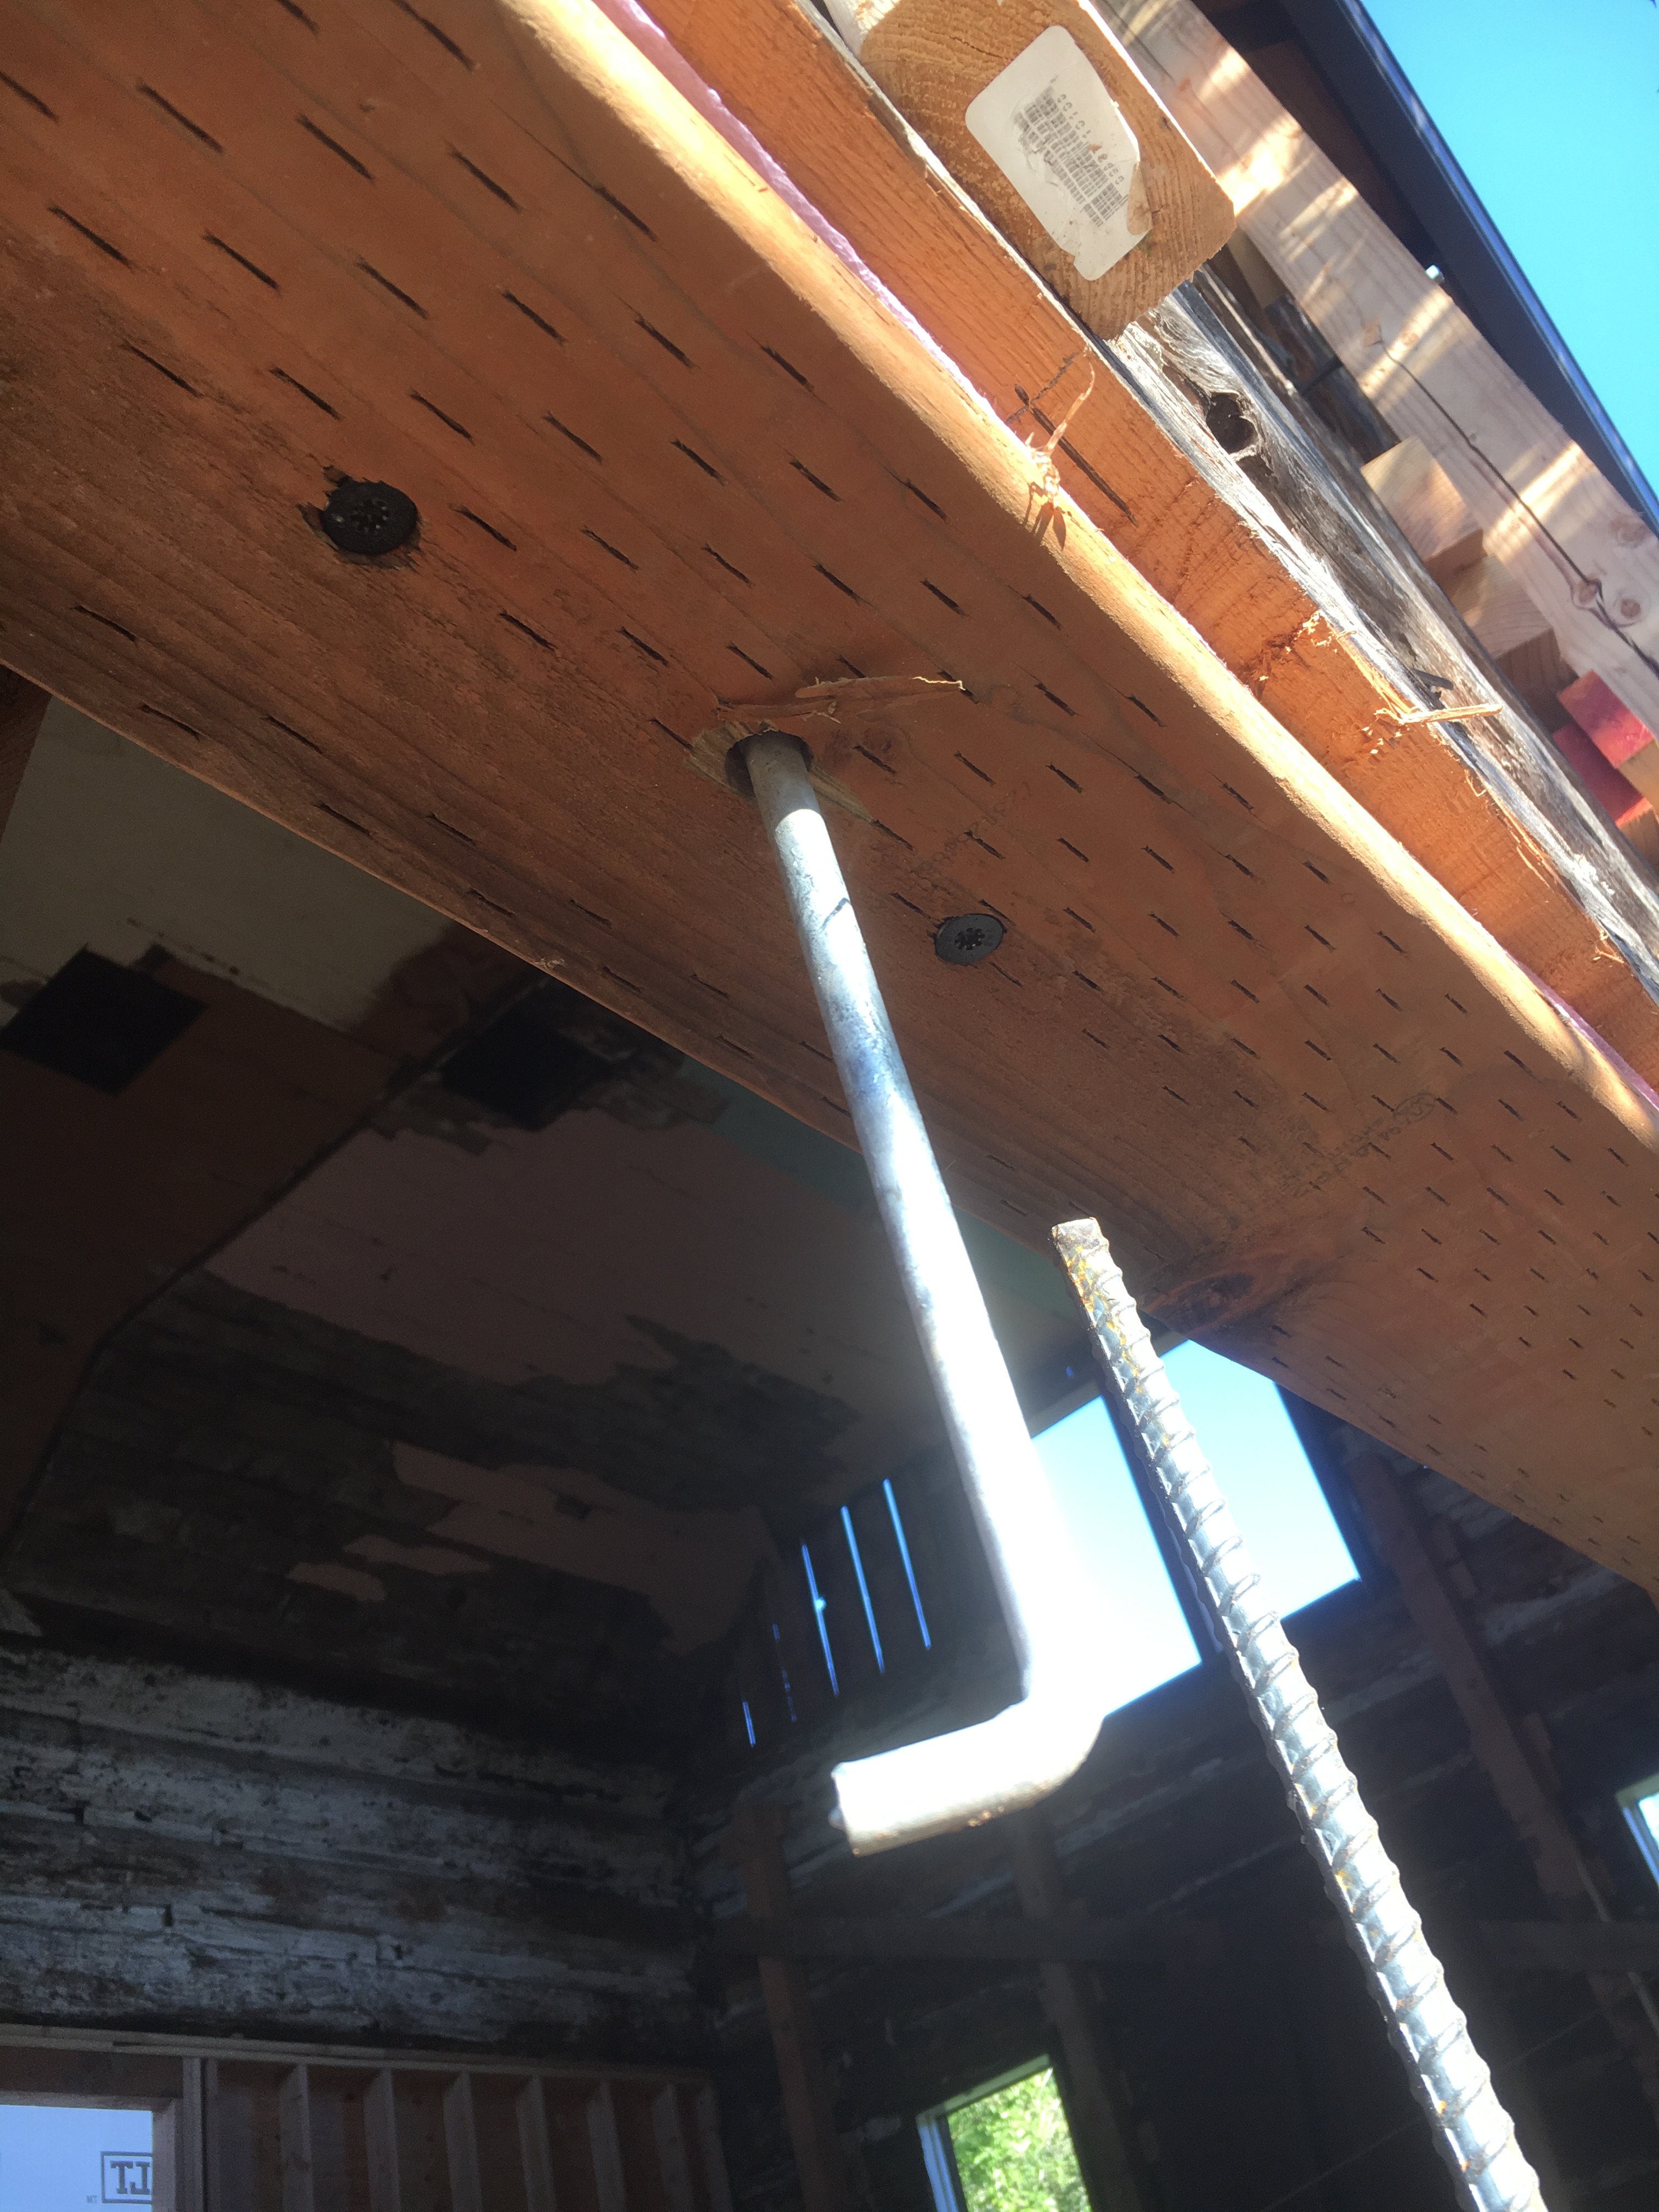
We were wishing our John Deere had a back hoe the whole day. Both our hands were blistered up by the end. But we did it! Then we had to get going on the form building, which we had become substantially faster at with practice from the first go around. However, first of all, we had to do this side in three pours: the footing, the first, wider, portion of the wall for the flooring lip, and the final, thinner, 6 inch portion of the wall. Secondly, for this wall, we needed to pour our foundation all the way up to touching the treated wood (concrete can’t touch untreated wood per code). So handy dandy FIL made some “bird mouths” and we poured our foundation all the way up. Which apparently I neglected to take any pictures of.

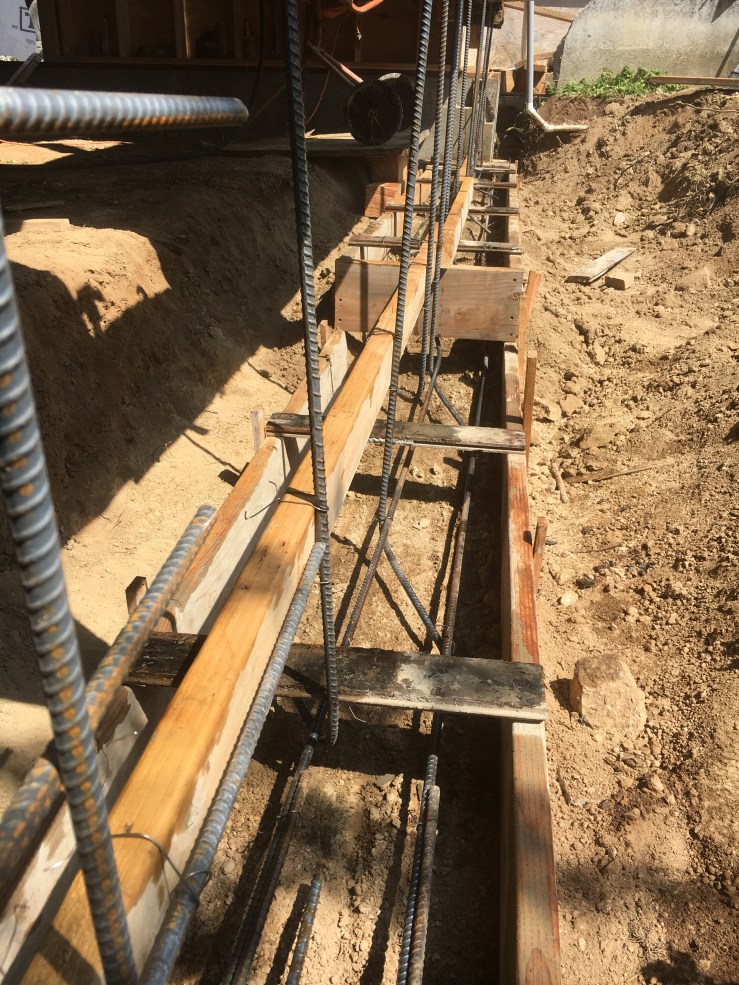
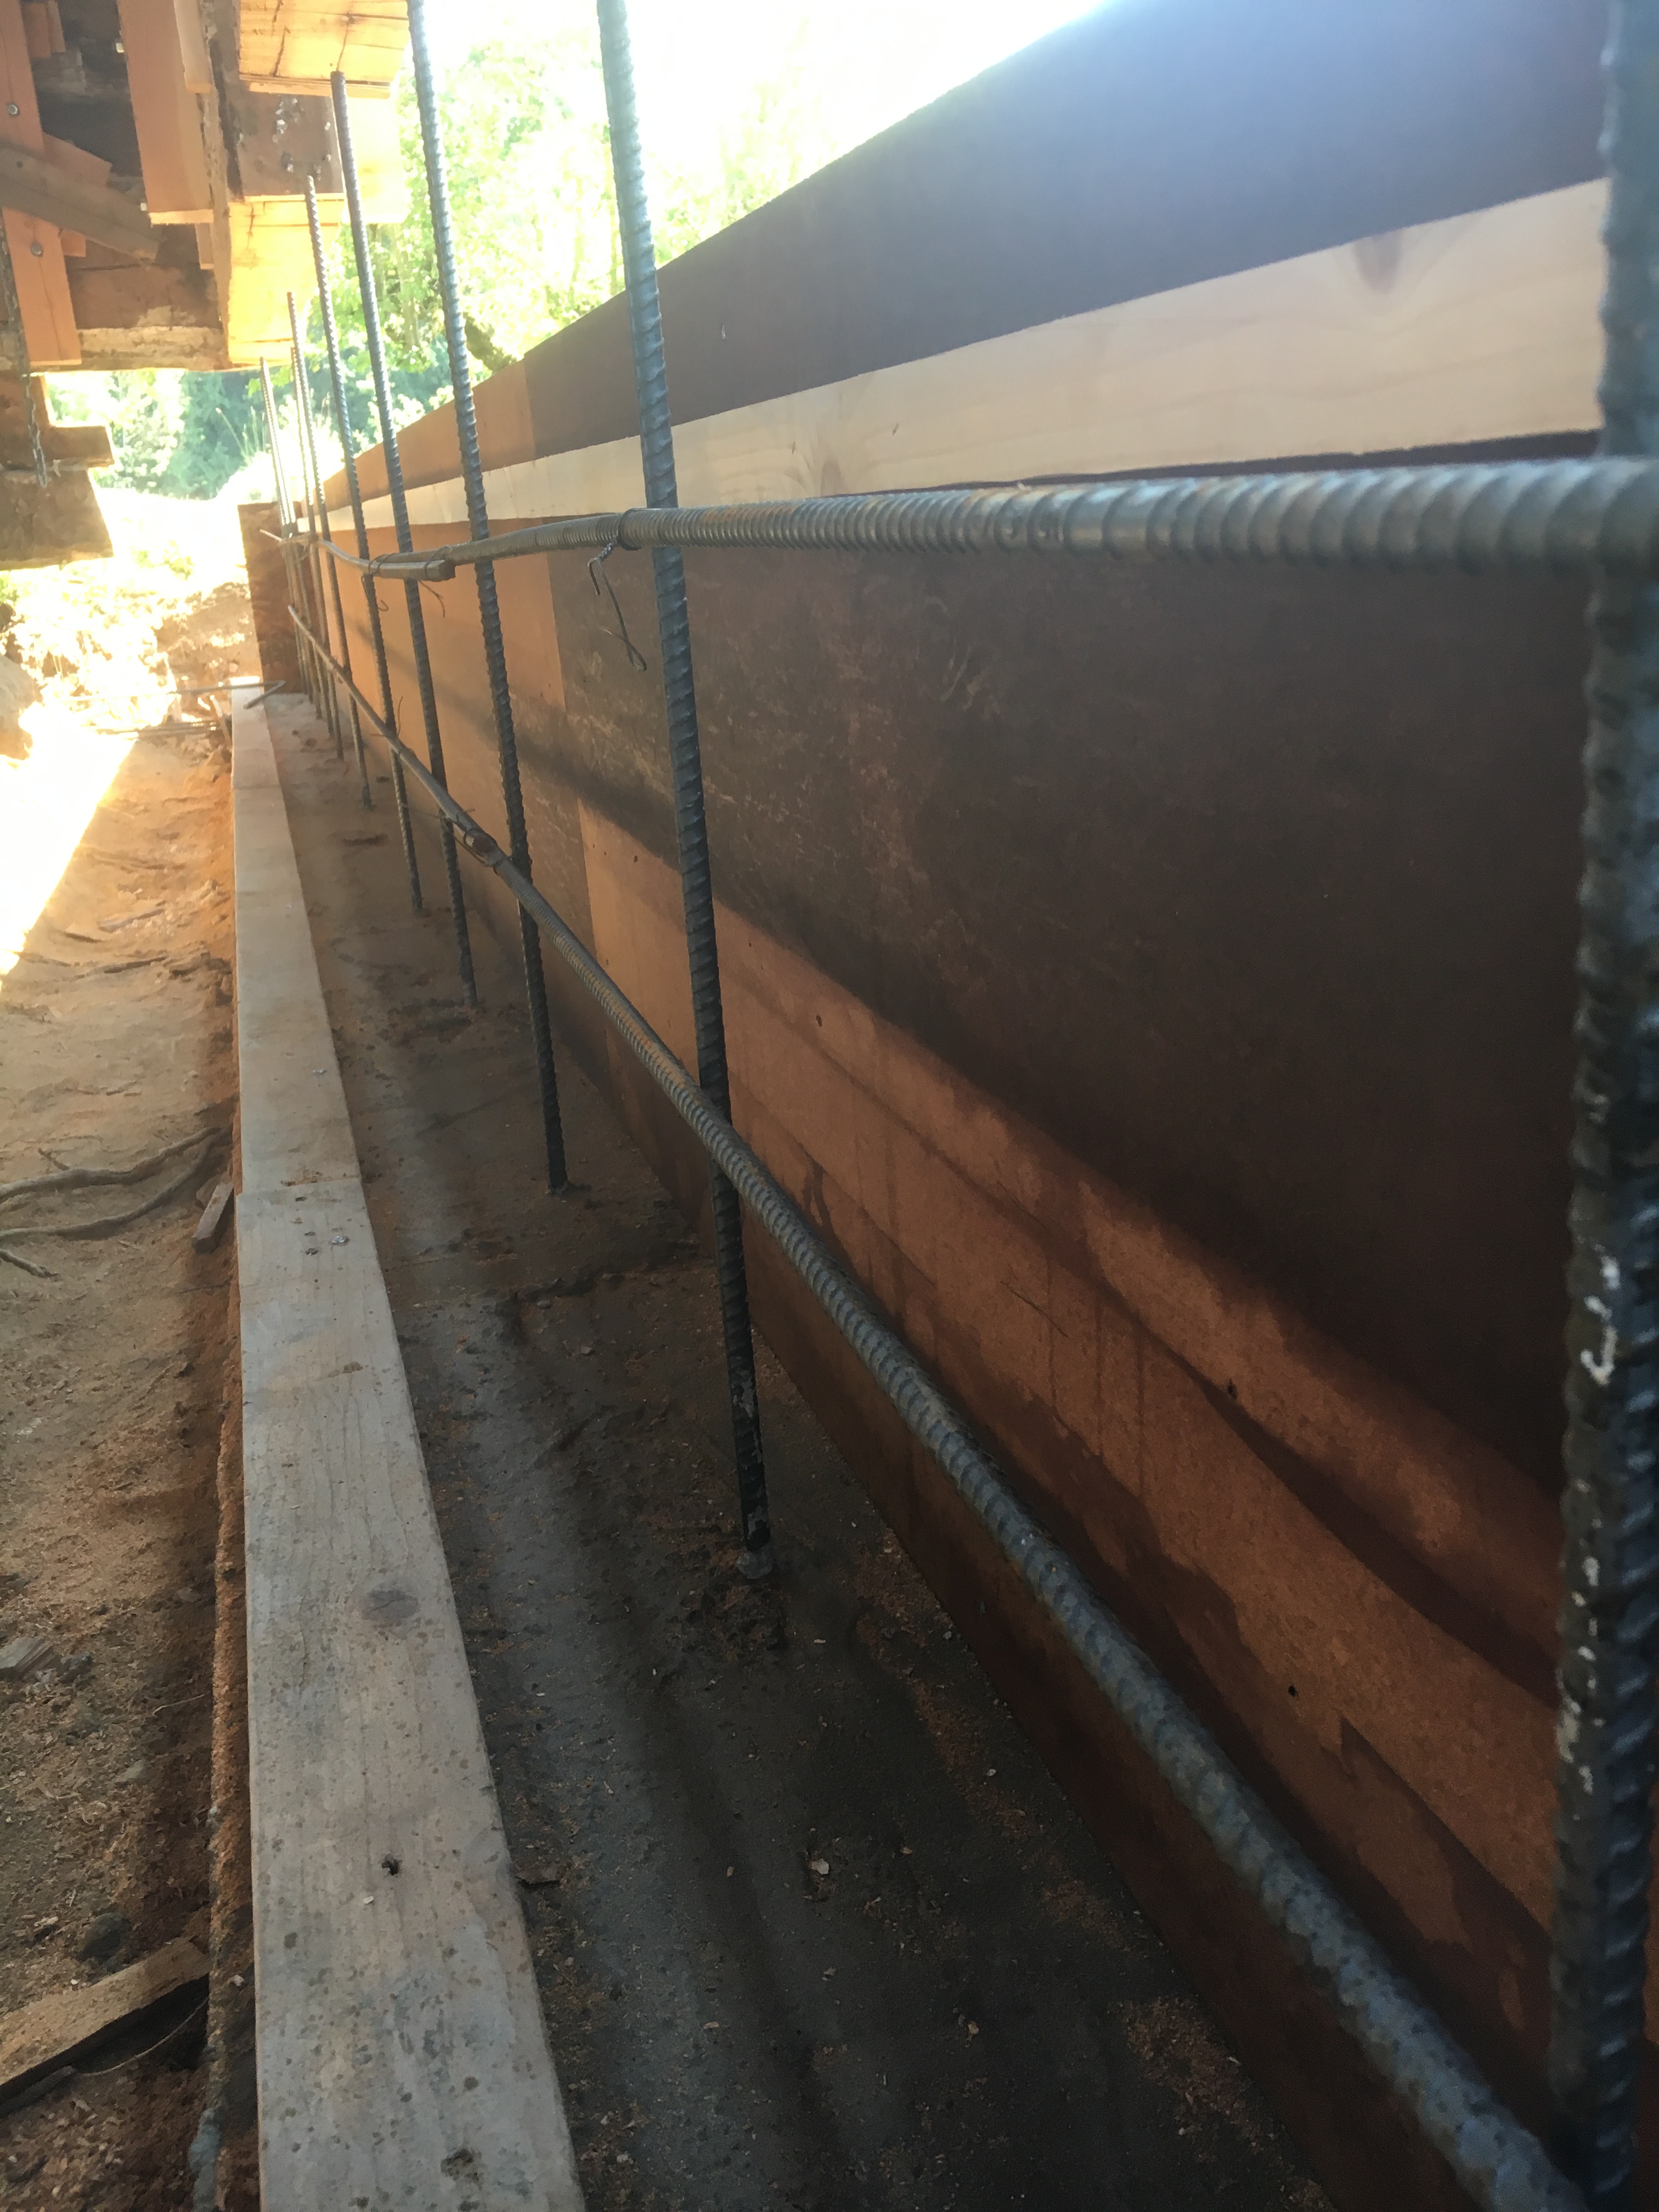
So after that full day of shovel digging and many blisters, I decided renting a little excavator was in store for the next couple of digs. Husband disagreed at first, but then when the time got closer he opted for the excavator and we decided to get both ditches dug and out of the way before the excavator had to go back. This made it possible to go much faster with the form building as well because the walls were so similar. We were able to just strip a form once the concrete was set up and set it up on the other wall for the next pour. Tying and hanging rebar was the most time consuming part.

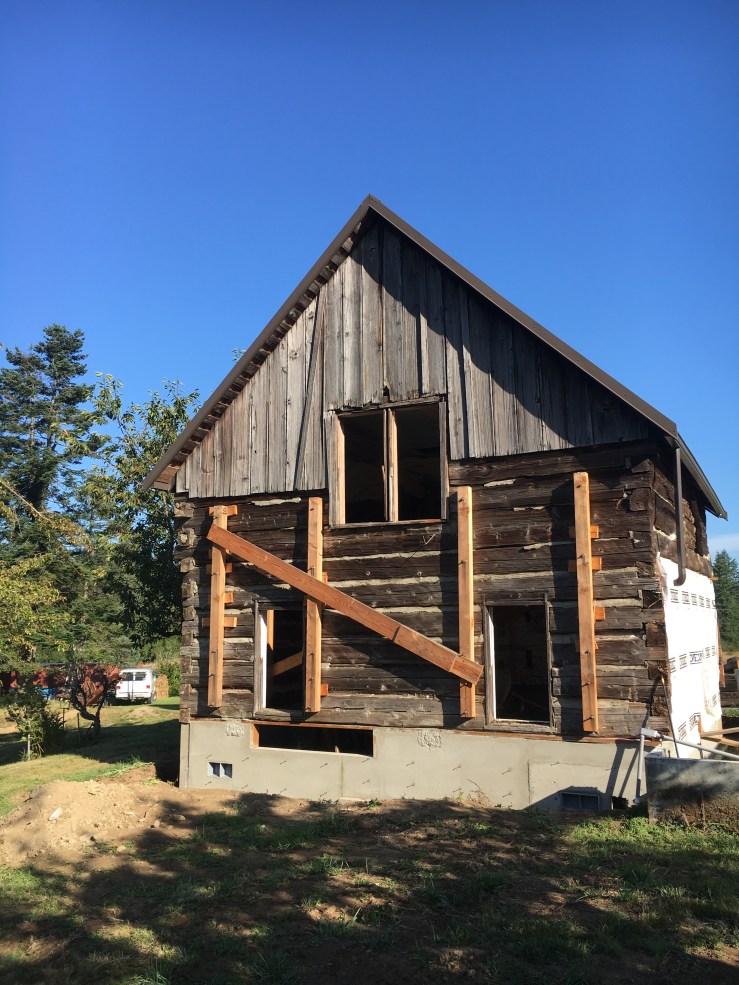
And just like that (three months later) we have an 1890’s Cabin on a brand new foundation!


Ohhh fun!
LikeLiked by 1 person